(I don't know about you, but every month is Crochet Month for me....)
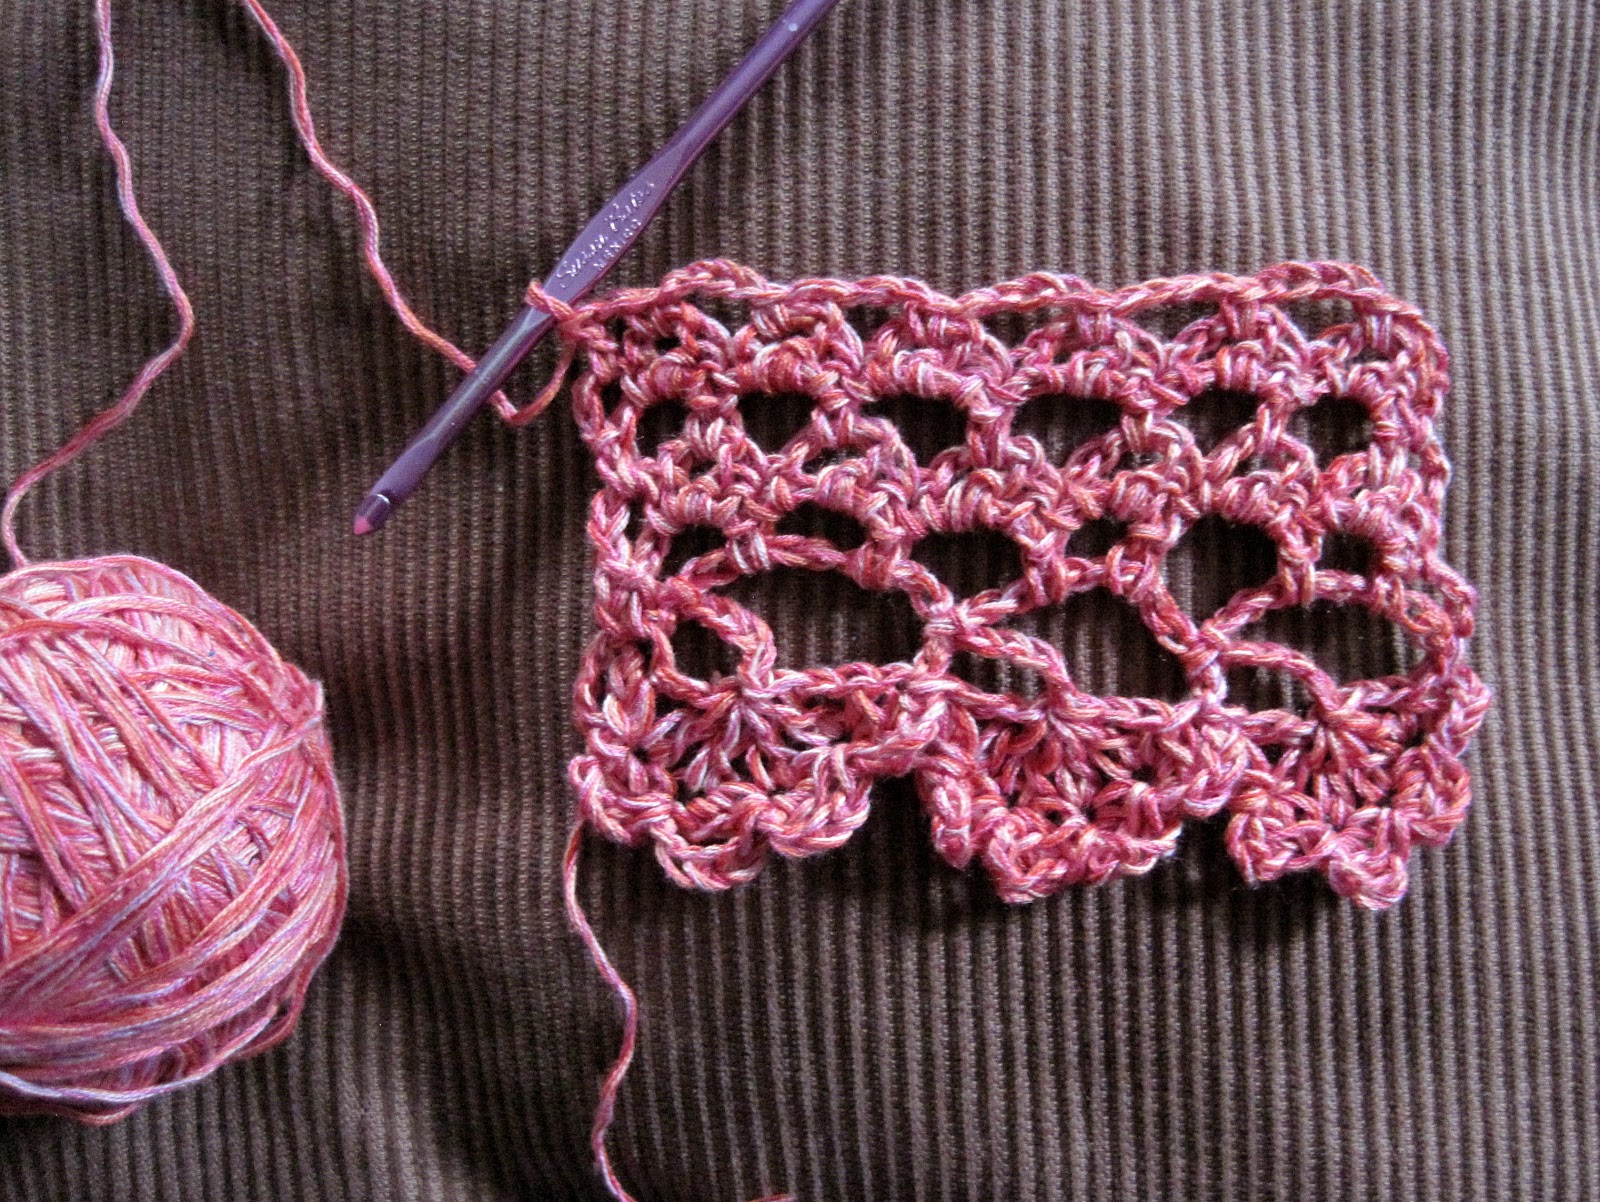
Here's a dainty little edging pattern to celebrate the end of winter and the coming of spring. Inspired by thoughts of blossom-laden branches, the Pear Blossom Edging features a row of overlapping, shell-like “flowers” dangling from a band of lacy mesh:
Blossom motifs are worked individually, from the outside in, and linked as you go. Mesh and picot rows are then worked back-and-forth above the blossom row. To help prevent stitch distortion at the starting edge, a reverse larks head knot is used as the starting loop before the first blossom only. (What would a Mrs. M pattern be without some kind of odd technique?)
Use the Pear Blossom Edging to trim scarves, shawls, aprons, towels, tees, pillowcases, or anything else that takes your fancy. I sewed a simple tubular scarf from rayon knit fabric, and used some of my swatches to trim the ends:
 |
| Perfect for spring! |
Materials Needed for Edging
• Small amounts of desired yarn (for fine or sportweight yarn, allow about 4 yards per motif segment, and slightly more for heavier yarns)
• Appropriate size hook
• Marker or yarn scrap
Yarns used in samples
Aunt Lydia’s Fashion Crochet Size 3 (CYCA 1), White, hook US D-3/3.25mm
Planet Penny Cotton Colours (CYCA 2), Raspberry Cream (swatch), Blueberry Cream (scarf ends), hook US F-5/3.75mm
Project Notes:
Gauge is not important for this pattern. If you want an idea of the pattern size, the pink swatch above (worked in light dk or sportweight cotton yarn) measures 3 3/4" long by 2 3/4" tall (each blossom is about 1 1/2" wide). Your edging size will vary according to your yarn, hook, and the number of motifs made.
Terms you will need to know: Back ridge of chain, front loop of chain
Special Stitches/Abbreviations
Reverse Larks Head Knot (see also Photos below): Lay yarn on a flat surface, with the skein on your left and the yarn tail on your right. Pick up yarn tail, loop it counterclockwise, and bring the tail down over the working yarn to form the shape of a “p”. Repeat with the working yarn, looping it clockwise to make a backwards “p” just to the left of the first “p”. Fold the looped parts together (like you’re closing the covers of a book) to make a double loop. Insert your hook sideways through the double loop, and gently snug the yarn against the hook. (Yarn should wrap around the hook like a scarf that has been folded in half, with the ends tucked through the fold.)
Cluster (this is actually a dc/sctog): Yarn over, insert hook into indicated stitch, pull up a loop, yarn over and draw through 2 loops on hook, insert hook into same stitch, pull up a loop, yarn over and draw through all loops on hook.
Dc5tog: *Yarn over, insert hook into next indicated stitch, pull up a loop, yarn over and draw through 2 loops on hook.* Rep from * 4 times (6 loops now on hook), yarn over and draw through all loops on hook.
Edc (extended double crochet): Yarn over, insert hook into indicated stitch, pull up a loop, ch 1, (yarn over and draw through 2 loops on hook) twice.
2EdcCl (2 extended double crochet cluster): *Yarn over, insert hook into indicated stitch, pull up a loop, ch 1, yarn over and draw through 2 loops on hook. Rep from * (3 loops now on hook), yarn over and draw through all loops on hook.
Picot: [Single crochet, chain 3, single crochet] in same space.
2dcCl (2 double crochet cluster): *Yarn over, insert hook into indicated stitch, pull up a loop, yarn over and draw through 2 loops on hook. Rep from * (3 loops now on hook), yarn over and draw through all loops on hook.
Pattern
First blossom motif: Leaving a 4”-6” tail, make Reverse Larks Head knot on hook.
Ch 1 to secure knot, being careful not to tighten the loops.
*Ch 5, make Cluster in back ridge of 5th chain from hook.
Rep from * 4 times; place marker (if desired) in last cluster made.
Ch 2 and rotate work to right (the ch-5 loops should now be at the bottom of your work). Notice that there is a “hole” or space above each cluster, where the back ridge has been stretched open by working into it.
Dc5tog across, inserting hook into the 5 open back ridge spaces.
Ch 5
tightly, slip st in larkshead knot (inserting hook sideways through both strands of knot), ch 10
tightly, turn (WS now facing), slip stitch in marked cluster. (Do not slip stitch in ch-5 space.)
Regular blossom motifs: With normal tension, ch 5, turn (RS now facing).
Inserting hook through back ridge and front loop of 5th chain from hook, make Cluster.
*Ch 5, make Cluster in back ridge of 5th chain from hook.
Rep from * 3 times; place marker (if desired) in last cluster, and rotate work to right.
Ch 2, dc5tog as before across the open spaces.
Ch 5 tightly, slip st in previous ch-10 space, ch 10 tightly, turn (WS now facing), slip stitch in marked cluster.
Repeat regular blossom motifs until edging is desired length,
ending your final motif with [ch 9, sc in cluster]. Work mesh rows as follows:
Mesh Row 1 (RS): [Ch 3, turn, edc in sc at base of ch (counts as 2EdcCl)], ch 1, sc in ch-10 sp.
*Ch 4, sc in same ch-10 space, chain 4, sc in next ch-10 space.
Rep from * across motifs, ending w/sc in final ch-10 sp.
Ch 4, sc in same ch-10 sp, ch 1, 2EdcCl in larks head knot.
Mesh Row 2 (WS): Ch 1, turn, sc in cluster, ch 2,
make Picot in next ch-4 space and in each ch-4 sp across,
ch 2, sc in cluster.
Mesh Row 3 (RS): [Ch 2, turn, dc in sc at base of ch], ch 2, sc in next picot ch-sp.
*Ch 4, sc in next picot ch-space. Rep from * across, ending w/sc in last picot ch-sp;
ch 2, sk 2 ch, 2dcCl in sc.
Mesh Row 4 (WS): Ch 1, turn, sc in cluster, ch 3, sc in ch-2 sp,
make Picot in next ch-4 sp and in each ch-4 sp across,
sc in ch-2 sp, ch 3, sc in cluster.
Mesh Row 5 (RS): Ch 3, turn, sc in next picot ch-sp,
*ch 3, sc in next picot ch-sp. Rep from * across, ending w/sc in last picot ch-sp.
Ch 1, hdc in sc.
Mesh Row 6 (WS): Ch 2, turn, 2 hdc in ch-1 sp,
*3 hdc in next ch-3 sp across, 2 hdc in next ch-3 sp. Rep from * across, ending w/2 hdc in corner ch-3 sp.
Cut yarn and weave in ends. Block edging and apply to anything that needs a touch of crochet. :)
Some Helpful Photos
Making the Larks Head Knot:
Starting the first Blossom motif:
Finishing the first Blossom Motif:
Where to insert your hook to make the
first Cluster of the next (and following) blossom(s):
Second blossom nearly complete:
How to end the final motif (when your edging is long enough and you're ready to start the mesh rows):
Making the First Mesh Row (top photo); completed Mesh Rows (bottom photo):
Remember, you can make your edging as long or short as you like by adding or subtracting flower motifs.
This pattern will be featured on
Underground Crafter's NatCroMo podcast of March 17th. Many thanks to Marie Segares for putting this series together!
~ ~ ~
You may do whatever you like with the items you make from this pattern, but you may not sell the pattern or reproduce the text without permission. (Links to this post are welcome.) If you make these for sale, please credit the designer.
If you have any questions about this pattern, or find any mistakes (it happens all the time), don't be shy: ask or tell in the comment box below, or contact me in Ravelry (where I'm MrsMicawber).
Thanks for viewing, and happy National Crochet Month!
~ ~ ~ ~ ~ ~ ~ ~ ~ ~ ~ ~